Change Processor Name Permanently
A while ago on Tweak And Trick, I published an article on changing your processor name. But recently, Anil Kumar pointed out that the trick only changed the name temporarily.
After a user restarts his computer, the name reverted back to original which is obvious as each time Windows boots, it checks the connected hardware and updates the registry value automatically. So,changing the processor name using the earlier article did not had permanent effect on the processor name.
Thus, the alien processor name you had earlier again reverted back to the boring old one.

Problem: To, make the name change permanent, it was required that the user updates the Processor Name String registry key each time when Windows starts.
Solution: It is very easy to change your processor name permanently by creating a registry key and placing a shortcut to it in the windows start up folder. To do so, just follow the steps given below:-
Steps :-
1. Open Notepad.
2. Copy and paste the exact code given below:-
To change the processor name, edit the part of the code given in blue. Also understand that \0 in the above code should only be present if Windows store your processor name at that location. Please open Registry Editor and navigate to the above mentioned keys to check whether or not to include the \0.
3. Click on File Menu, click on Save As and select "All Types" in Save as Type option. Save the file as ProcessorNameChange.reg or *.reg.
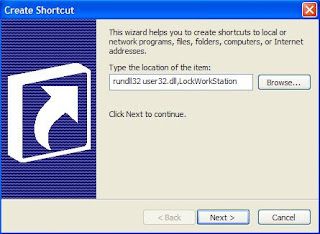
4. Create a new shortcut on your desktop. Enter regedit / S "Location of the .reg file" as the location of the item. For example, enter regedit /S "C:\Processor Name.reg" if your registry file is located in the root of C:\ drive.

5. Copy the created Shortcut file.
6. Navigate to C:\Documents and Settings\All Users\Start Menu\Programs\Startup (in Windows XP) or toC:\Users\ User-Name\AppData\Roaming\Microsoft\Windows\Start Menu\Programs\Startup (in Windows 8, Windows 7 and Windows Vista. Also remember that AppData is a hidden folder.) if C: is your System drive.
7. Paste the copied file.
This registry file would now execute each time when Windows starts and the Processor Name String would be modified each time. So, even upon restarting your computer, you will see that the changed processor name is permanent.
After a user restarts his computer, the name reverted back to original which is obvious as each time Windows boots, it checks the connected hardware and updates the registry value automatically. So,changing the processor name using the earlier article did not had permanent effect on the processor name.
Thus, the alien processor name you had earlier again reverted back to the boring old one.

Problem: To, make the name change permanent, it was required that the user updates the Processor Name String registry key each time when Windows starts.
Solution: It is very easy to change your processor name permanently by creating a registry key and placing a shortcut to it in the windows start up folder. To do so, just follow the steps given below:-
Steps :-
1. Open Notepad.
2. Copy and paste the exact code given below:-
To change the processor name, edit the part of the code given in blue. Also understand that \0 in the above code should only be present if Windows store your processor name at that location. Please open Registry Editor and navigate to the above mentioned keys to check whether or not to include the \0.
3. Click on File Menu, click on Save As and select "All Types" in Save as Type option. Save the file as ProcessorNameChange.reg or *.reg.
4. Create a new shortcut on your desktop. Enter regedit / S "Location of the .reg file" as the location of the item. For example, enter regedit /S "C:\Processor Name.reg" if your registry file is located in the root of C:\ drive.

5. Copy the created Shortcut file.
6. Navigate to C:\Documents and Settings\All Users\Start Menu\Programs\Startup (in Windows XP) or toC:\Users\ User-Name\AppData\Roaming\Microsoft\Windows\Start Menu\Programs\Startup (in Windows 8, Windows 7 and Windows Vista. Also remember that AppData is a hidden folder.) if C: is your System drive.
7. Paste the copied file.
This registry file would now execute each time when Windows starts and the Processor Name String would be modified each time. So, even upon restarting your computer, you will see that the changed processor name is permanent.
